 This is the result. I got the idea to make this wedding card because recently lots of my friends inviting me to their wedding ceremony, so, I would like to congratulates them with the creation of this greeting card. The rings symbolized the unity of two hearts and the bride/bridegroom of cause symbolized them. I choose white, black and gold color because they represent sacred, charming and luxury elements.
Showing posts with label Creation. Show all posts
Showing posts with label Creation. Show all posts
Monday, January 17, 2011
Final Outcome
This is the result. I got the idea to make this wedding card because recently lots of my friends inviting me to their wedding ceremony, so, I would like to congratulates them with the creation of this greeting card. The rings symbolized the unity of two hearts and the bride/bridegroom of cause symbolized them. I choose white, black and gold color because they represent sacred, charming and luxury elements.
Step by Step
 Step 1: Hold 'Ctrl' and press 'N' to make a new A3 size file. Click 'View' on menu bar to show the ruler. Then I divide it into two side by using 'Line Tool'.

 Step 2: Hold 'Ctrl'+ O to open the new images (bride/bridegroom, man ring, woman ring). I use 'Rectangular Marquee Tool' to select the image of bride/bridegroom. For both of rings I use 'Quick Selection Tool' to select them.
 Step 3: After I select the rings, I want to make them as a one picture, so, I click 'Ctrl +T' to resize the woman ring image to make it fit into the man ring and intersect with each other. Then, I right click at the ring layer, choose 'Merge Down' to make them as one.
 Step 4: I click 'Filter' from the menu bar, choose 'Blur'-'Lens Blur' then I change the 'Radius' into 11 to make the picture a bit blur.
 Step 5: I click 'Layer' from menu bar, choose 'New Adjustment Layer'-'Colour Balance' and change the colour level to make the picture more magenta and red looks.
  Step 6: As for the wording, I use 'Type Tool' and choose 'Mistral'-36pt for the font.
 Step 7: I use 'Quick Selection Tool' and set the brush diameter to 47 to select the lace. Then hold 'Alt+drag' to copy the image, click 'Edit' from the menu bar, 'Transform' and choose 'Rotate 90CW' to change the lace position. After that, copy the top lace to make the bottom lace, and copy the right lace to make the other side lace. Arrange the laces to make it look like a picture frame.
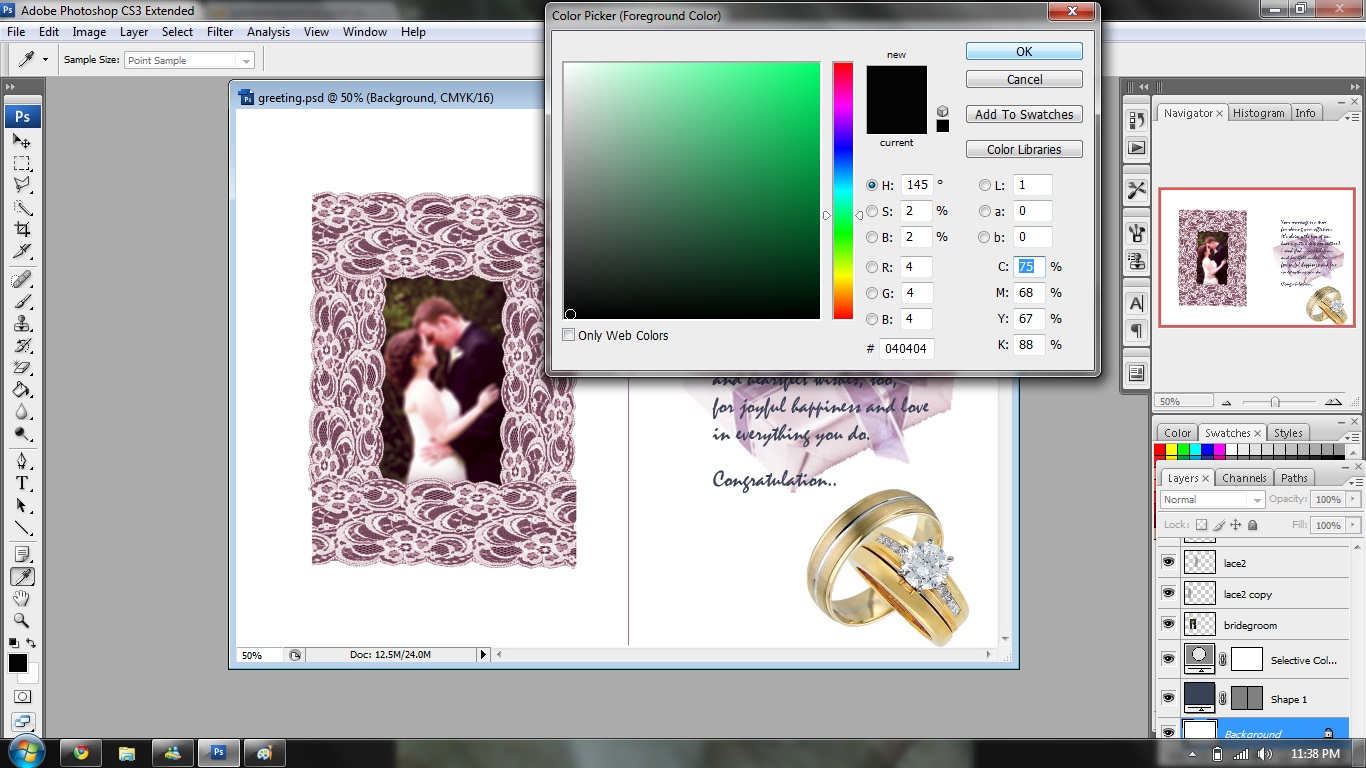 Step 8: I want to change the background color, so, I select the background layer, I choose black color from the color picker, and using 'Paint Bucket Tool' to color the background.
 Step 9: After I change the background color, the greeting is not so visible, so I change the 'Layer Style' of the greeting. I add 'Drop Shadow' + 'Bevel and Emboss' +'Contour' to make it more outstanding.


 Step 10: I open the new image (present) by clicking 'Ctrl+O' then, by using 'Quick Selection Tool' I select the image. I use 'Magic Eraser Tool' to erase the white color between the ribbon- it's quite hard to select the perfect clean image. Then to make the image more tidy, I use 'Blur Tool' and click it at the present box surrounding. After that, I click 'Layer' from the menu bar, choose 'New Adjustment Layer' - 'Selective Color' , then I adjust the color to make it less magenta, cyan and black, but more yellow. Now the color changed to gold color.
 Step 11: By using 'Type Tool' I add the "Congratulations" word on the top of card. I choose the same font as the greeting but I change the size to 72pt. I also change the color - to make the color like the present color, I use 'Eyedropper Tool' and click it at the present box and automatically the color changed. Lastly, to make the word more outstanding, I change the layer style by adding 'Inner Shadow'.
p/s: please correct me if i do wrong
Monday, December 13, 2010
Final Outcome

This is my FOM Open Day e-Wallpaper. I use "Flare Center" to represent the bright future as my tagline, "Your Future Begins Here"
I also use navy blue as my background colour to keep my wallpaper a sort of harmony in colour. Match with MMU logo, MMU mascot and FOM monument.
Step by Step


 Step 1: I make a new A4 size layer, colour background (navy blue) as a background. I use 'Rectangular Marque Tool' and 'Elliptical Marque Tool' to select the pictures and hold 'Alt' to copy it into my new background. Then press 'Ctrl T' to resize the pictures.
 Step 2: For the FOM monument, I use 'Polygonal Lasso Tool' because I only want to select the blue area. Then, hold 'Alt' and drag it into background file.
 Step 3: I use 'Line Tool' and 'Ellipse Tool' to make the line that connecting the FOM monument to each pictures.
 Step 4: Select the pictures layer (except FOMcafe layer) and I change the 'Blending Mode' to 'Hard Light'. Now, the pictures look darker than before. For FOM monument layer, I set the blending mode to 'Lighten' to make the picture more bright.
 Step 5: I use 'Horizontal Type Tool' and choose ISOCTEUR as font for the text (Date and Tagline) and Footlight MT Light for the title and I choose gray for the colour.

Step 6: To select MMU Mascot, I use 'Quick Selection Tool' after that, click 'Selection Tool' and hold 'Alt' to copy and drag the mascot into wallpaper. For MMU logo, I just drag it into the wallpaper.


Step 7: Select the background layer, click 'Filter' at menu bar, choose 'Render', 'Lens Flare' and change the brightness to 60%. Finally, Clicked twice at the background layer to change the layer style, I add 'Inner Shadow' and 'Bevel and Emboss' to make my wallpaper more interesting.
Sunday, November 21, 2010
Assignment 1 – Fruit Face.. :D

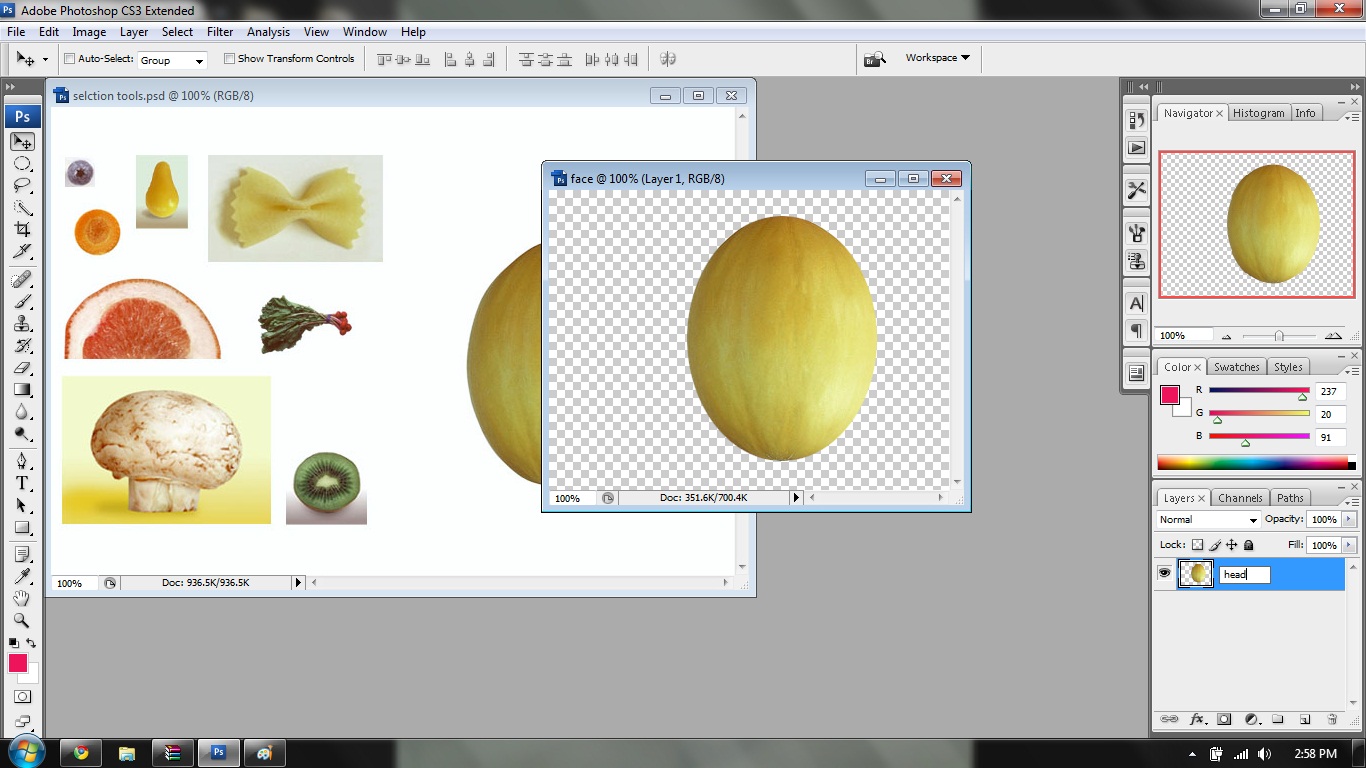
I want to create a face of a girl with a chef hat.. First, I create a new file and named it as 'face'. Then I use Elliptical Marquee Tool to select the honey dew,after that use Selection Tool and hold 'Alt' to copy it to new file ('face'). I also use the same tools to select and copy the 'eyes' , but in the different layer (new layer).

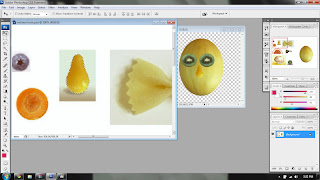
Then, I use Rectangular Marquee Tool and select the outer picture of 'nose', use Magic Wand Tool and hold 'Shift' to select only the nose shape. Use Selection Tool and hold 'Alt' to copy it to 'face file' in new layer.

After that, I use Quick Selection Tool to select 'mouth' and click Free Transform to change the size. Then choose Transform and Flip Vertical to change the position.


To make her pony tail hair, I use Quick Selection Tool, copy and paste it in a new layer. For the another pony tail hair, copy it again and click 'Edit' at menu bar, choose 'Transform' and 'Flip Horizontal'. Move the hair layer below the head layer.


Again, I use Quick Selection Tool to select the hat and eyes brow. For the hat, I hold 'ctrl T' to change the size and shape and for the eyes brow, first I hold 'ctrl T' to change the size then copy it and select the copied eyes brow click 'Edit' at menu bar, choose 'Transform' and 'Flip Horizontal'. I use Elliptical Marquee Tool to select the eyes ball and ears as to make it more interesting. Also move the ears layers below the head layer.
p/s: please correct me if i do wrong
Sunday, September 5, 2010
Step by Step
Layer 1
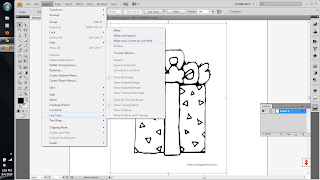
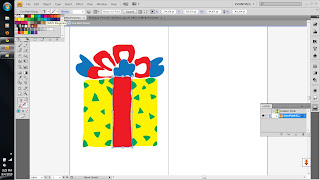

1st step: Import the original picture of present, I click 'object' from menu bar,choose 'live trace' , 'make and convert to paint'. Double click at this picture to make them in 'isolation mode'. Then I choose yellow, red, blue and green CMYK color for this present. Select all the picture, then hold 'Ctrl' then press 'G' to make it in a group. Copy this present, and change the color again, to make it different.
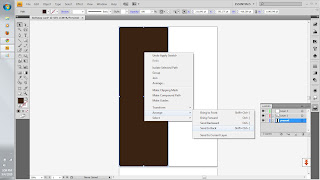 2nd step: I use 'rectangle tool' and choose brown CMYK color. Then, right click it, choose 'arrange' - 'bring to back' to make it as a background.
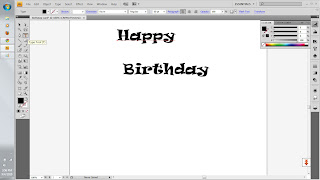 3rd step: Use 'type tool' to make 'Happy Birthday' word. I choose 'Ravie' and magenta color for the font. I change the size to 60 pt.
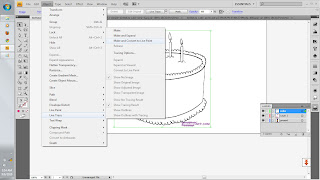
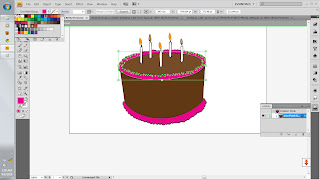 1st step: This step is like 1st step in layer 1. Import the original picture of cake, I click 'object' from menu bar,choose 'live trace' , 'make and convert to paint'. Double click at this picture to make them in 'isolation mode'. Then I choose brown, pink and orange CMYK color for this cake. Select all the picture, then hold 'Ctrl' then press 'G' to make it in a group.
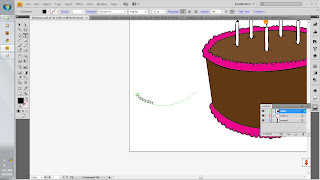 2nd step: use 'arc tool' to draw a path, use 'type tool' and click it right on the path to make the word (Happy Birthday) looks like a curve. Then, drag it onto the cake.
 3rd step: same step as 1st step.
 4th step: select the cake, and change the opacity to 50% to make it a little bit blur.
p/s: please correct me if i do wrong
 2nd step: I use 'rectangle tool' and choose brown CMYK color. Then, right click it, choose 'arrange' - 'bring to back' to make it as a background.
 3rd step: Use 'type tool' to make 'Happy Birthday' word. I choose 'Ravie' and magenta color for the font. I change the size to 60 pt.
Layer 2


1st step: Use "type tool' again to make the wishes, this time, i choose ScriptS as for font and change the color to pink and the size to 36pt. Then, I click 'align center' to make it more nice.
Layer 3

 1st step: This step is like 1st step in layer 1. Import the original picture of cake, I click 'object' from menu bar,choose 'live trace' , 'make and convert to paint'. Double click at this picture to make them in 'isolation mode'. Then I choose brown, pink and orange CMYK color for this cake. Select all the picture, then hold 'Ctrl' then press 'G' to make it in a group.
  2nd step: use 'arc tool' to draw a path, use 'type tool' and click it right on the path to make the word (Happy Birthday) looks like a curve. Then, drag it onto the cake.
 3rd step: same step as 1st step.
 4th step: select the cake, and change the opacity to 50% to make it a little bit blur.
p/s: please correct me if i do wrong
Subscribe to:
Posts (Atom)